


.svg) By - Gaurav Vermma
By - Gaurav Vermma  Featured Events
 Sep 09, 2026
The One Detail That Decides Whether Your Booth Gets Noticed
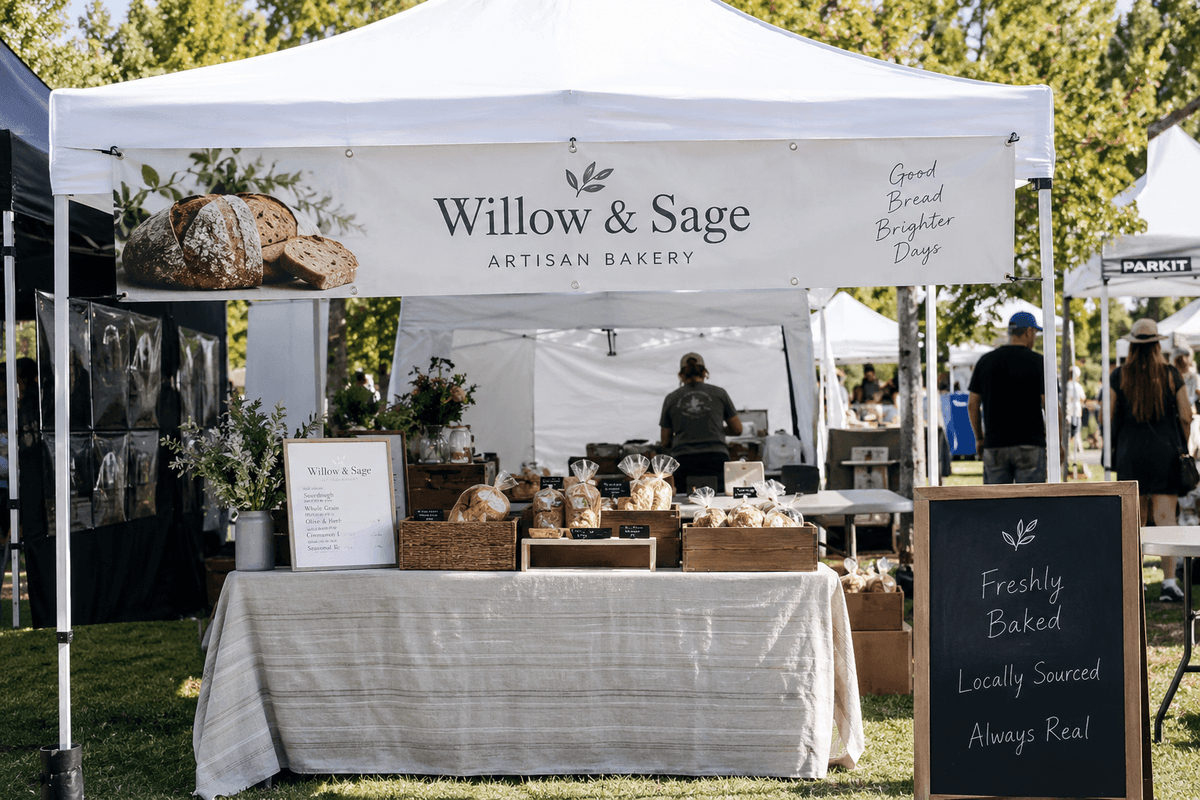
A well-placed banner can turn a basic canopy into a clear, professional signpost for your business. In this guide, you’ll learn how to hang a banner on a canopy tent, which attachment methods work best, where to position it for visibility, and how to keep it secure outdoors.
Know Your Banner Type Before You Hang It
Before choosing how to hang a banner on a canopy tent, look at how it was made. The banner’s finishing details usually tell you which hanging method will be easiest and safest. Using the wrong attachment point can leave the banner sagging or put unnecessary stress on the tent frame.
Common banner styles include:
-
- Grommet banners: These have reinforced holes around the edges, making them suitable for cords, hooks, clips, or other fasteners.
- Loop-strap banners: Fabric loops or straps can wrap around sections of the canopy frame without requiring holes in the banner.
- Pole-pocket banners: A sewn pocket along an edge allows a pole or support bar to pass through it. These are useful when the canopy has a compatible structure.
If your banner doesn’t have grommets, sewn loops, hook-and-loop straps, and clips are your best options — avoid punching holes into a banner that wasn’t designed for them.
Check the banner and frame before installation. You want attachment points that support the banner without interfering with the tent’s opening, walls, or moving parts.
Where a Well-Hung Banner Actually Matters
Canopy tents show up everywhere — but how much your banner needs to work depends on the setting.
-
- Festivals and street fairs: rows of nearly identical tents mean your banner is often the only thing separating you from the booth next door.
- Farmers markets: repeat weekly setups reward reusable, quick-attach methods (straps, clips) over anything that takes ten minutes to install.
- Trade shows and corporate activations: banners need to read clearly from across a hall or crowded aisle, not just up close.
- Sporting events and outdoor expos: wind and long hours mean durability matters as much as visibility.
Knowing which of these you’re setting up for should shape both your hanging method and where you place the banner.
Best Ways to Hang a Banner on a Canopy Tent
There is no single best method for every canopy. The right choice depends on your banner’s construction, how often you install it, and whether the tent will be used indoors or outside.
| Hanging method | Best for | Durability | Main consideration |
| Bungee cords | Grommet banners | High | Flexible and easy to tension |
| Zip ties | Temporary installations | Medium | Fast, but less convenient to remove |
| Hook-and-loop straps | Fabric banners and sidewalls | Medium–High | Reusable and gentle on fabric |
| Rope | Larger outdoor banners | Medium | Requires secure knots and adjustment |
| Carabiners/clips | Frequent setup and takedown | High | Convenient when compatible with the frame |
Start by attaching the top edge of the banner, then work toward the sides and bottom. Keep the tension even rather than pulling one corner dramatically tighter than the others. For repeated events, reusable straps or clips are often more convenient than disposable fasteners — for many grommet banners, bungee cords remain the simplest overall choice, since they’re flexible, adjustable, and easy to remove between events.
A purpose-built custom tent can also make branding easier because its frame and accessories may be designed to work with branded graphics and display panels.
Where to Position Your Banner So It Gets Seen
A banner can be perfectly installed and still perform poorly if people cannot see it. Position it where your target audience naturally looks as they approach your space, while keeping entrances and important displays unobstructed.
For a standard 10×10 canopy, a side-facing banner can work well when visitors approach from the side, while a front-facing banner is more useful when your booth faces a main aisle. Think about sightlines from several steps away rather than judging the placement while standing directly underneath it.
Keep the most important information — such as your business name, logo, or short message — in a prominent area. Avoid placing critical text too close to edges where it may be partially hidden by the tent frame or folds.
Since 10×10 tents vary in frame design, valances, and sidewall configurations, there’s no single universal banner size — measure your actual hanging area before ordering or installing anything.
Keep Your Banner Secure in Wind and Weather
Outdoor conditions can change quickly, so a banner should be attached firmly without creating unnecessary strain on the canopy.
-
- Use every appropriate attachment point available rather than relying on a single corner.
- Keep the banner reasonably flat, but do not pull it so tightly that the fabric or fasteners are under constant excessive tension.
- Make sure clips, ties, or cords are attached to solid parts of the frame.
- Avoid fastening a banner in a way that blocks doors, sidewalls, or emergency access.
- Check the banner and attachment points after setup and periodically during the event.
- In strong or unsafe wind conditions, follow the canopy manufacturer’s guidance and consider removing the banner or taking down the tent.
Reusable straps, suitable clips, and other frame-compatible fasteners can secure a banner without drilling into or permanently modifying the tent — avoid methods that pinch, tear, or place excessive stress on the canopy fabric. The goal is a secure display, not maximum tension. A properly supported banner should look neat while allowing the canopy and its attachment hardware to do their job.
Conclusion
A canopy banner works best when three things come together: the right attachment method, smart positioning, and secure installation. Get those details right, and your tent becomes more than shelter — it becomes a visible extension of your brand that helps people recognize your booth before they even reach it, whether you’re set up at a festival, a farmers market, or a corporate trade show floor.